


Common Apple Watch Band Problems and Solutions
Apple Watch bands can cause issues like poor fit, skin irritation, installation trouble, wear and tear, or compatibility challenges. Here's how to tackle these problems:
- Fit Issues: Measure your wrist accurately and choose the right band style (like Sport Band or Solo Loop) for a snug yet comfortable fit.
- Skin Irritation: Opt for hypoallergenic materials like silicone or titanium, clean your band regularly, and allow airflow to reduce moisture buildup.
- Installation Problems: Align the band correctly, clean connectors, and avoid forcing stuck bands to prevent damage.
- Wear and Tear: Clean and maintain bands based on their material (e.g., silicone, leather, or metal) and replace them when showing signs of damage.
- Compatibility: Ensure your band matches your Apple Watch size and consider quality trade-offs between official and third-party bands.
Quick Overview of Common Issues and Solutions
| Problem | Solution |
|---|---|
| Poor Fit | Measure your wrist, select the right band type, and adjust as needed. |
| Skin Irritation | Use skin-friendly materials, clean regularly, and allow airflow. |
| Installation Issues | Align bands properly, clean connectors, and avoid forcing stuck bands. |
| Wear and Tear | Follow material-specific care tips and replace damaged bands. |
| Compatibility | Match band size to watch model; choose between official or third-party. |
By addressing these concerns, you can enhance your Apple Watch experience, ensuring comfort, durability, and functionality. Read on for detailed tips and maintenance advice.
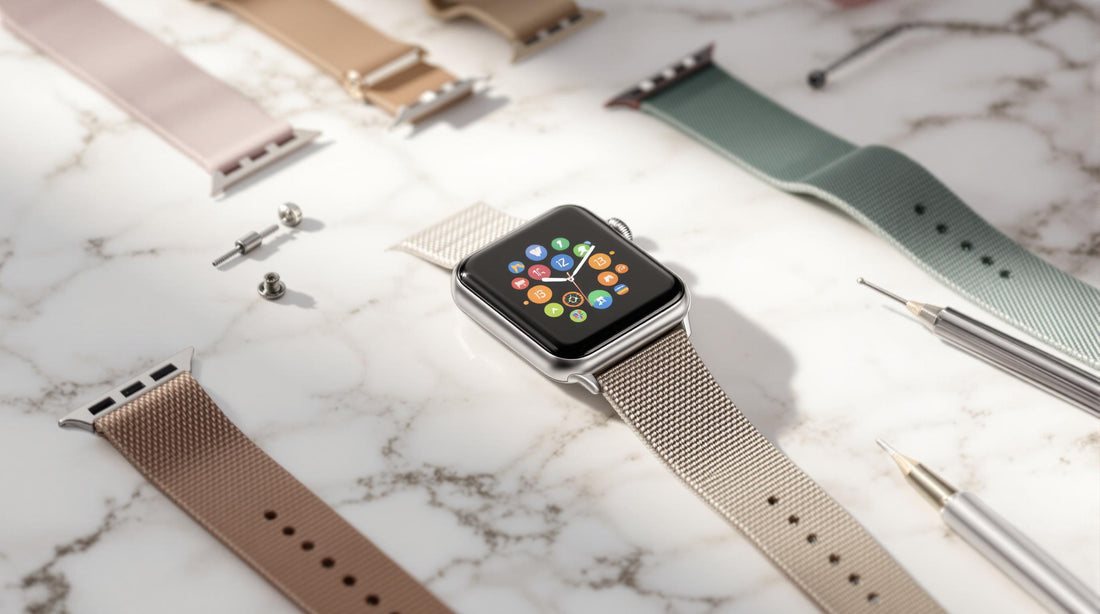
How To Fix Stuck Apple Watch Band

Common Fit Problems
Getting the right fit for your Apple Watch band is important for both comfort and functionality. A properly fitted band ensures comfort, prevents irritation, and helps the watch's sensors work correctly for accurate health tracking. On the other hand, a band that's too tight can cause discomfort, while a loose one may compromise security and affect sensor performance [1].
How to Measure for the Right Size
Measuring your wrist accurately is the first step to finding the right size. The 40/41mm Apple Watch models are designed for wrists between 130-200mm, while the 44/45mm models fit wrists ranging from 140-220mm.
- Wrap a measuring tape snugly around your wrist where the watch will sit.
- If measuring in inches, convert to millimeters by multiplying by 25.4, then round up to the nearest half centimeter.
For Solo Loop and Braided Solo Loop bands, opt for a slightly smaller size as these bands tend to stretch over time [1].
Tips for Adjusting Band Styles
Each Apple Watch band style has its own method of adjustment to achieve the best fit [2].
| Band Type | Adjustment Method | Fit Characteristics |
|---|---|---|
| Sport Band | Pin-and-tuck holes | Preset holes for adjustments |
| Sport Loop | Hook-and-loop fastener | Fully customizable fit |
| Milanese Loop | Magnetic closure | Smooth, magnetic adjustment |
| Solo Loop | Non-adjustable | Requires exact initial size |
When wearing your Apple Watch, make sure the band is snug but not too tight. You should be able to slide one finger under the band, but the watch shouldn't move around on your wrist. This is especially important for accurate heart rate monitoring and other health features [1].
Leather bands may stretch over time, so occasional adjustments might be needed. Additionally, check the fit throughout the day to ensure comfort and proper sensor alignment [5].
Once you've nailed the fit, you can focus on addressing other potential issues, like preventing skin irritation.
Skin Irritation and Allergies
Skin irritation can result from allergies to certain materials, moisture buildup, or friction. To avoid discomfort, it's crucial to select the right materials and maintain good hygiene practices.
Choosing Skin-Friendly Materials
The material of your watch band plays a key role in preventing irritation. Here's a quick guide to some common options:
| Material Type | Features | Ideal For |
|---|---|---|
| Medical-grade Silicone | Gentle, non-reactive | Sensitive skin, active users |
| Titanium | Hypoallergenic, durable | Those with metal allergies |
| Nylon | Breathable, wicks moisture | Hot weather, workouts |
| Organic Leather | Naturally breathable | Formal settings, delicate skin |
Tip: If you have sensitive skin or allergies, consider consulting a dermatologist before committing to a new band.
Keeping Your Band Clean
Regular cleaning is essential, especially after sweating or exposure to dirt. Use mild soap and water for daily cleaning. For a more thorough clean, remove the band weekly and wash all surfaces. Make sure it’s completely dry before reattaching [3].
To reduce irritation:
- Adjust the band occasionally to allow airflow.
- Remove the watch if you notice redness or discomfort.
- Consult a professional if irritation persists.
Reminder: If you develop a rash or irritation from your Apple Watch, take it off immediately [5].
Now that we've covered skin irritation, let’s move on to the practicalities of installing and removing your band.
Problems with Installation and Removal
Installing and removing Apple Watch bands should be simple, but it doesn’t always go smoothly. Using the right technique can help avoid damaging your watch or band.
How to Attach Bands Correctly
Start by placing your Apple Watch face down on a soft surface to prevent scratches. Align the band with the slots (make sure the text is facing up), then slide it in until you hear a click. To ensure it’s secure, gently twist the band without pressing the release button.
Keep in mind that different band styles have specific attachment methods. For example, the Link Bracelet requires pressing a quick release button to separate into two pieces, while the Modern Buckle uses release buttons on the sides of its magnetic closure [4].
Fixing Stuck Bands
If you’re dealing with a stuck band, resist the urge to force it. Instead, clean the release button area with a soft brush or cloth. For more stubborn dirt, a small amount of isopropyl alcohol applied with a Q-tip can work wonders.
"I pour a little IPA into the cap of the bottle, dip the Q-Tip in, and apply a little around the band release button." - Adrian Kingsley-Hughes from ZDNET
For tougher situations, try these tips:
- Make sure the release button is fully pressed before attempting removal.
- Regularly clean the connection points on both the watch and the band to prevent buildup.
- Use a plastic tool carefully if needed, avoiding anything that could scratch your watch.
"Understanding how the band locks in place can help remove it safely." - Adrian Kingsley-Hughes, Author at ZDNET [4]
Using the correct methods for installation and removal not only makes the process easier but also helps protect your Apple Watch and band from unnecessary wear and tear. Once your band is securely attached, maintaining it properly will keep it in great shape for longer.
sbb-itb-f6ade85
Dealing with Wear and Tear
A sturdy band not only complements your Apple Watch's look but also keeps it functioning smoothly over time. Daily exposure to sweat, movement, and external factors can take a toll on your watch band.
How to Make Your Band Last Longer
Each band material needs specific care to stay in good shape. For silicone bands, regular cleaning helps prevent dirt and bacteria buildup [5].
Leather bands require a bit more attention. Wipe them with a lint-free cloth, use a leather conditioner once a month, and keep them away from water.
"Your leather straps will last longer if you clean them once every other week." - Ryan Popoff, Creative Mind Behind Popov Leather [5]
Metal bands are best cleaned monthly using a soft cloth and mild soap to remove any residue.
Signs You Need a New Band
Here’s how to tell if it’s time to replace your band:
Physical Damage:
- Frayed edges
- Cracks or splits in the material
- Loose or broken clasps
- Stains or discoloration that won’t come off
Functional Issues:
- The band no longer fits securely
- The clasp doesn’t lock properly
- The material feels brittle or stiff
Most bands last about 1-2 years, though frequent exposure to sweat or water can shorten their lifespan [5]. To help them last longer, store your bands in a cool, dry place.
Compatibility Issues
Getting the right Apple Watch band is more than just a style choice - it’s about making sure it fits and functions correctly with your device. Let’s break down what you need to know.
Apple Watch Sizes and Band Compatibility
Apple Watch cases come in different sizes, including 40mm, 41mm, 44mm, and 45mm. The Ultra 2 has a 49mm case. Here's how the bands match up:
- Bands for 38mm, 40mm, and 41mm cases can be used interchangeably.
- Bands for 42mm, 44mm, and 45mm cases are also cross-compatible.
- Bands designed for 44mm and 45mm cases will fit the 49mm Ultra 2 as well.
Official vs. Third-Party Bands
Choosing between Apple's official bands and third-party options? Here’s what to keep in mind:
- Official Apple Bands: These ensure perfect fit and durability, though they come at a premium price.
- Third-Party Bands: These are more affordable, with prices starting around ₹199 for basic straps and going up to ₹999 for higher-end designs. However, quality can vary, and some may not last as long or work perfectly with all features [4].
Troubleshooting Band Connection Issues
If your band isn’t attaching properly, follow these steps:
- Clean the connectors: Remove any dirt or debris that might block a secure connection.
- Align the band correctly: Ensure it slides in smoothly and lines up with the case.
- Listen for the click: A clicking sound confirms the band is securely attached.
- Test the connection: Gently pull on the band to make sure it’s locked in place.
"A properly installed band will remain secure and only release when the band release button is pressed." - Spartan Watches [4]
Keep in mind that third-party bands may sometimes cause issues with features like wrist detection or the compass [5]. While they’re budget-friendly and offer more variety, they can show wear and tear within a few months, unlike Apple’s more durable official options.
Managing Your Apple Watch Band
Taking care of your Apple Watch band is simpler when you address common issues like fit, irritation, and installation properly. Regular cleaning is a must for all band types, and each material - whether leather, silicone, or stainless steel - requires its own care routine. For those with sensitive skin, materials like high-grade silicone or stainless steel are often a safer choice.
To avoid installation or compatibility problems, make sure you're using the correct size for your Apple Watch model and follow the recommended steps during setup. If you're looking for budget-friendly alternatives, third-party retailers like Friday offer bands priced between ₹199 and ₹999. These come in a variety of materials and styles to suit different preferences.
Keep in mind, while third-party bands are more affordable, they may show wear faster than official Apple bands [5]. However, with proper care and maintenance, you can extend the life of most bands well beyond their typical one-year lifespan. If ongoing problems persist, consider checking out specialized retailers that cater specifically to Apple Watch users for tailored solutions.
FAQs
Why won't my Apple Watch strap lock in or stay secure?
If your Apple Watch band isn't attaching or staying in place, try these steps:
- Check the alignment: Make sure the band is aligned correctly, push it in firmly, and listen for a click.
- Remove obstructions: If you're using a protective case, remove it to ensure it’s not interfering.
- Clean the connectors: Dirt or debris can cause attachment problems, so keep the connection points clean.
Inspect the band and watch for issues:
- Test the release button to confirm it's working properly.
- Look for any visible damage to the band or connection points.
- Double-check that your band is compatible with your specific Apple Watch model.
"If your Apple Watch band is not staying securely fastened, make sure it is properly aligned and attached to the watch. Additionally, check the release button to ensure it is functioning properly and securely holding the band in place." - Spartan Watches, October 2023
If the issue seems to be a manufacturing defect, such as a problem with the flat metal connector, reach out to Apple Support for a replacement. Using a loose or improperly secured band could lead to damage or even loss of your watch, so it's important to address the problem quickly.
For more tips on cleaning and maintenance, refer to the "Problems with Installation and Removal" section mentioned earlier.